Setting up a Custom Git Trigger
A Custom Git Trigger is a generic way for any git server to act as a build trigger.
It relies solely on SSH keys and its webhook endpoint; everything else is left to the user to implement.
Creating a Trigger
Creating a Custom Git Trigger is similar to the creation of any other trigger with a few subtle differences:
- It is not possible for Quay.io to automatically detect the proper robot account to use with the trigger. This must be done manually in the creation process.
- There are extra steps after the creation of the trigger that must be done in order to use the trigger. These steps are detailed below.
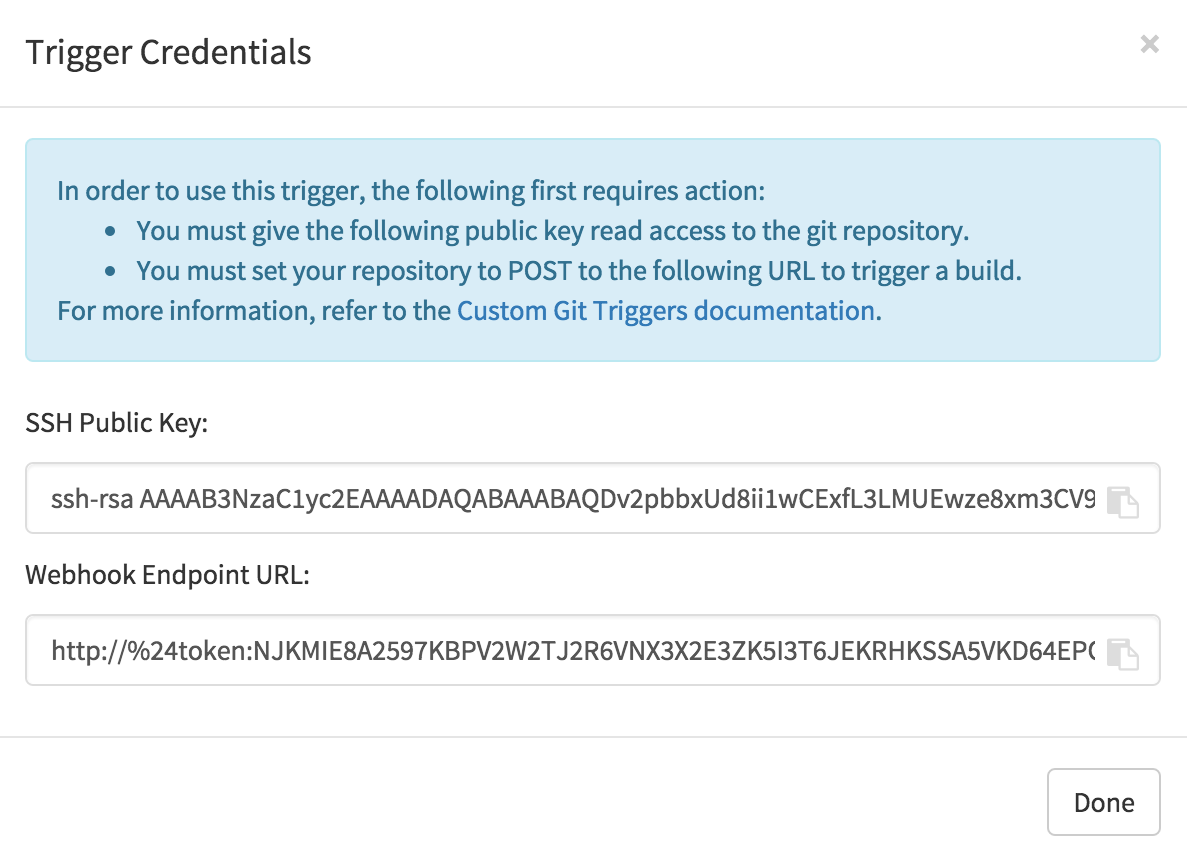
Post-creation setup
Once a trigger has been created, there are 2 additional steps required before the trigger can be used:
- Provide read access to the SSH public key generated when creating the trigger.
- Setup a webhook that POSTs to the Quay.io endpoint to trigger a build.
The key and the URL are both available at all times by selecting ‘View Credentials’ from the gear located in the trigger listing.
SSH public key access
Depending on the git server setup, there are various ways to install the SSH public key that Quay.io generates for a custom git trigger. For example, the git documentation describes a small server setup in which simply adding the key to $HOME/.ssh/authorize_keys would provide access for builders to clone the repository. For any git repository management software that isn’t officially supported, there is usually a location to input the key often labeled as “Deploy Keys”.
Webhook
In order to automatically trigger a build, one must POST a JSON payload to the webhook URL with the following format:
{
  "commit": "1c002dd",                                   // required
  "ref": "refs/heads/master",                            // required
  "default_branch": "master",                            // required
  "commit_info": {                                       // optional
    "url": "gitsoftware.com/repository/commits/1234567", // required
    "message": "initial commit",                         // required
    "date": "timestamp",                                 // required
    "author": {                                          // optional
      "username": "user",                                // required
      "avatar_url": "gravatar.com/user.png",             // required
      "url": "gitsoftware.com/users/user"                // required
    },
    "committer": {                                       // optional
      "username": "user",                                // required
      "avatar_url": "gravatar.com/user.png",             // required
      "url": "gitsoftware.com/users/user"                // required
    }
  }
}
Note: This request requires an Content-Type header containing application/json in order to be valid.
Once again, this can be accomplished various ways depending on the server setup, but for most cases can be done via a post-receive git hook.